Setup a NAS + Homelab using Raspberry Pi
Harshit Kumar / June 25, 2025
9 min read
––– views
I was tired of using cloud storage solutions and wanted to set up my own Network Attached Storage (NAS) at home. I also wanted to peek behind the curtains of how an app like Google photos works, where you can upload your photos and access them from anywhere. After some research, I decided to use a Raspberry Pi for this purpose. This article will guide you through the steps to set up your own NAS using a Raspberry Pi. It will also guide you through the process of setting up OpenMediaVault, CasaOs, Immich and Tailscale on your Raspberry Pi. All of these are quite easy to set up and will give you the ability to access your photos from anywhere.
Prerequisites
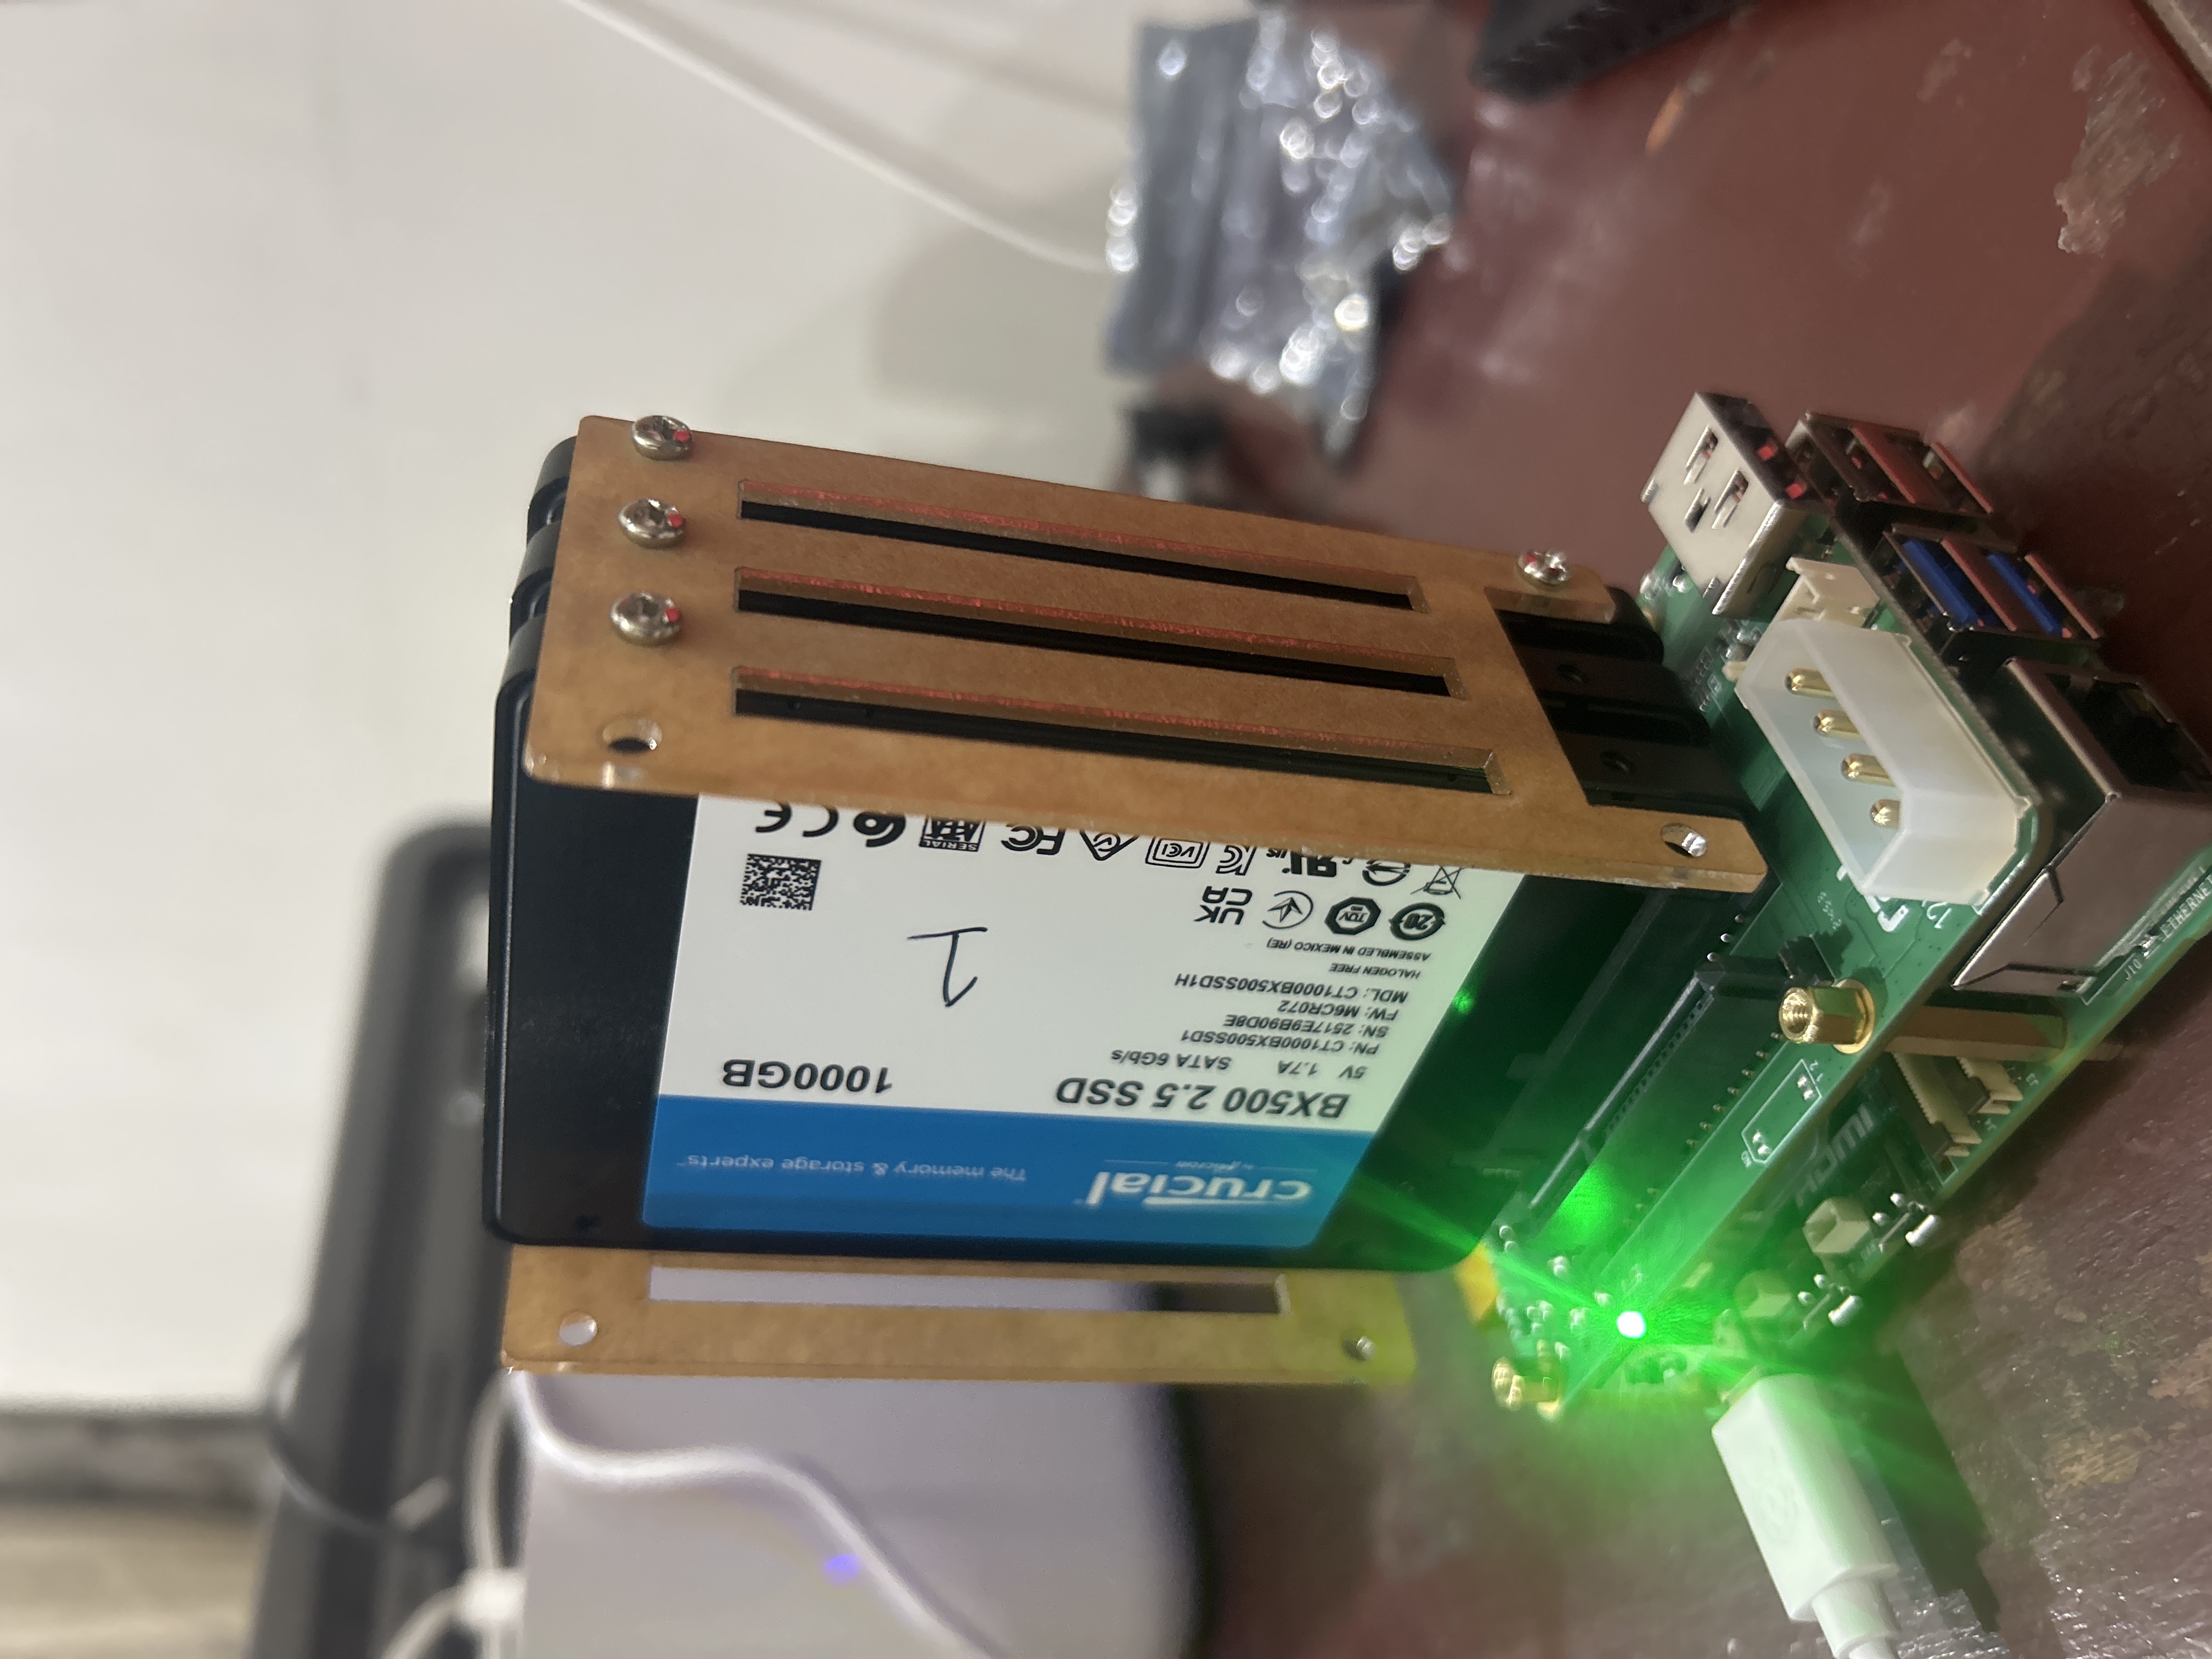
- A Raspberry Pi (I used a Raspberry Pi 5 with 8GB RAM)
- Active cooler
- A microSD card (I used a 64GB SanDisk Ultra)
- Radxa SATA HAT
- 3 2.5 inch SATA SSDs (I used 3 1TB SSDs)
- A USB-C power supply (I used a 5V 3A power supply)
Setting up the Raspberry Pi
- Download the latest version of Raspberry Pi OS from the official website.
- Use Raspberry Pi Imager to flash the OS onto the microSD card. You can follow https://www.raspberrypi.com/documentation/computers/getting-started.html for detailed instructions on how to do this.
- Insert the microSD card into the Raspberry Pi.
- Connect the active cooler to the Raspberry Pi. You will need to break off 3 fins from the active cooler to make the SATA hat fit properly on the Raspberry Pi 5. Jeff Geerling has a video on how to do this: The ULTIMATE Raspberry Pi 5 NAS
- Connect the Radxa SATA HAT to the Raspberry Pi. Make sure to follow the instructions provided by Radxa for connecting the SATA HAT to the Raspberry Pi. You can find the instructions on their website
- Connect the 3 SATA SSDs to the Radxa SATA HAT.
- Connect the USB-C power supply to the Raspberry Pi.
- Power on the Raspberry Pi and wait for it to boot up.
Setting up OpenMediaVault
We will use OpenMediaVault (OMV) as our NAS operating system. OMV is a free network-attached storage server based on the Debian operating system. It provides a web-based interface to manage your storage, shares, and services.
- Open a terminal on your Raspberry Pi or connect to it via SSH.
- Update the package list and install the necessary dependencies:
sudo apt update - Install OpenMediaVault using the following command:
sudo wget -O - https://raw.githubusercontent.com/openmediavault/openmediavault/master/install.sh | sudo bash - After the installation is complete, you can access the OpenMediaVault web interface by navigating to
http://<your-raspberry-pi-ip-address>in your web browser. - Log in with the default credentials:
- Username:
admin - Password:
openmediavault
- Username:
- Change the default password after logging in for the first time.
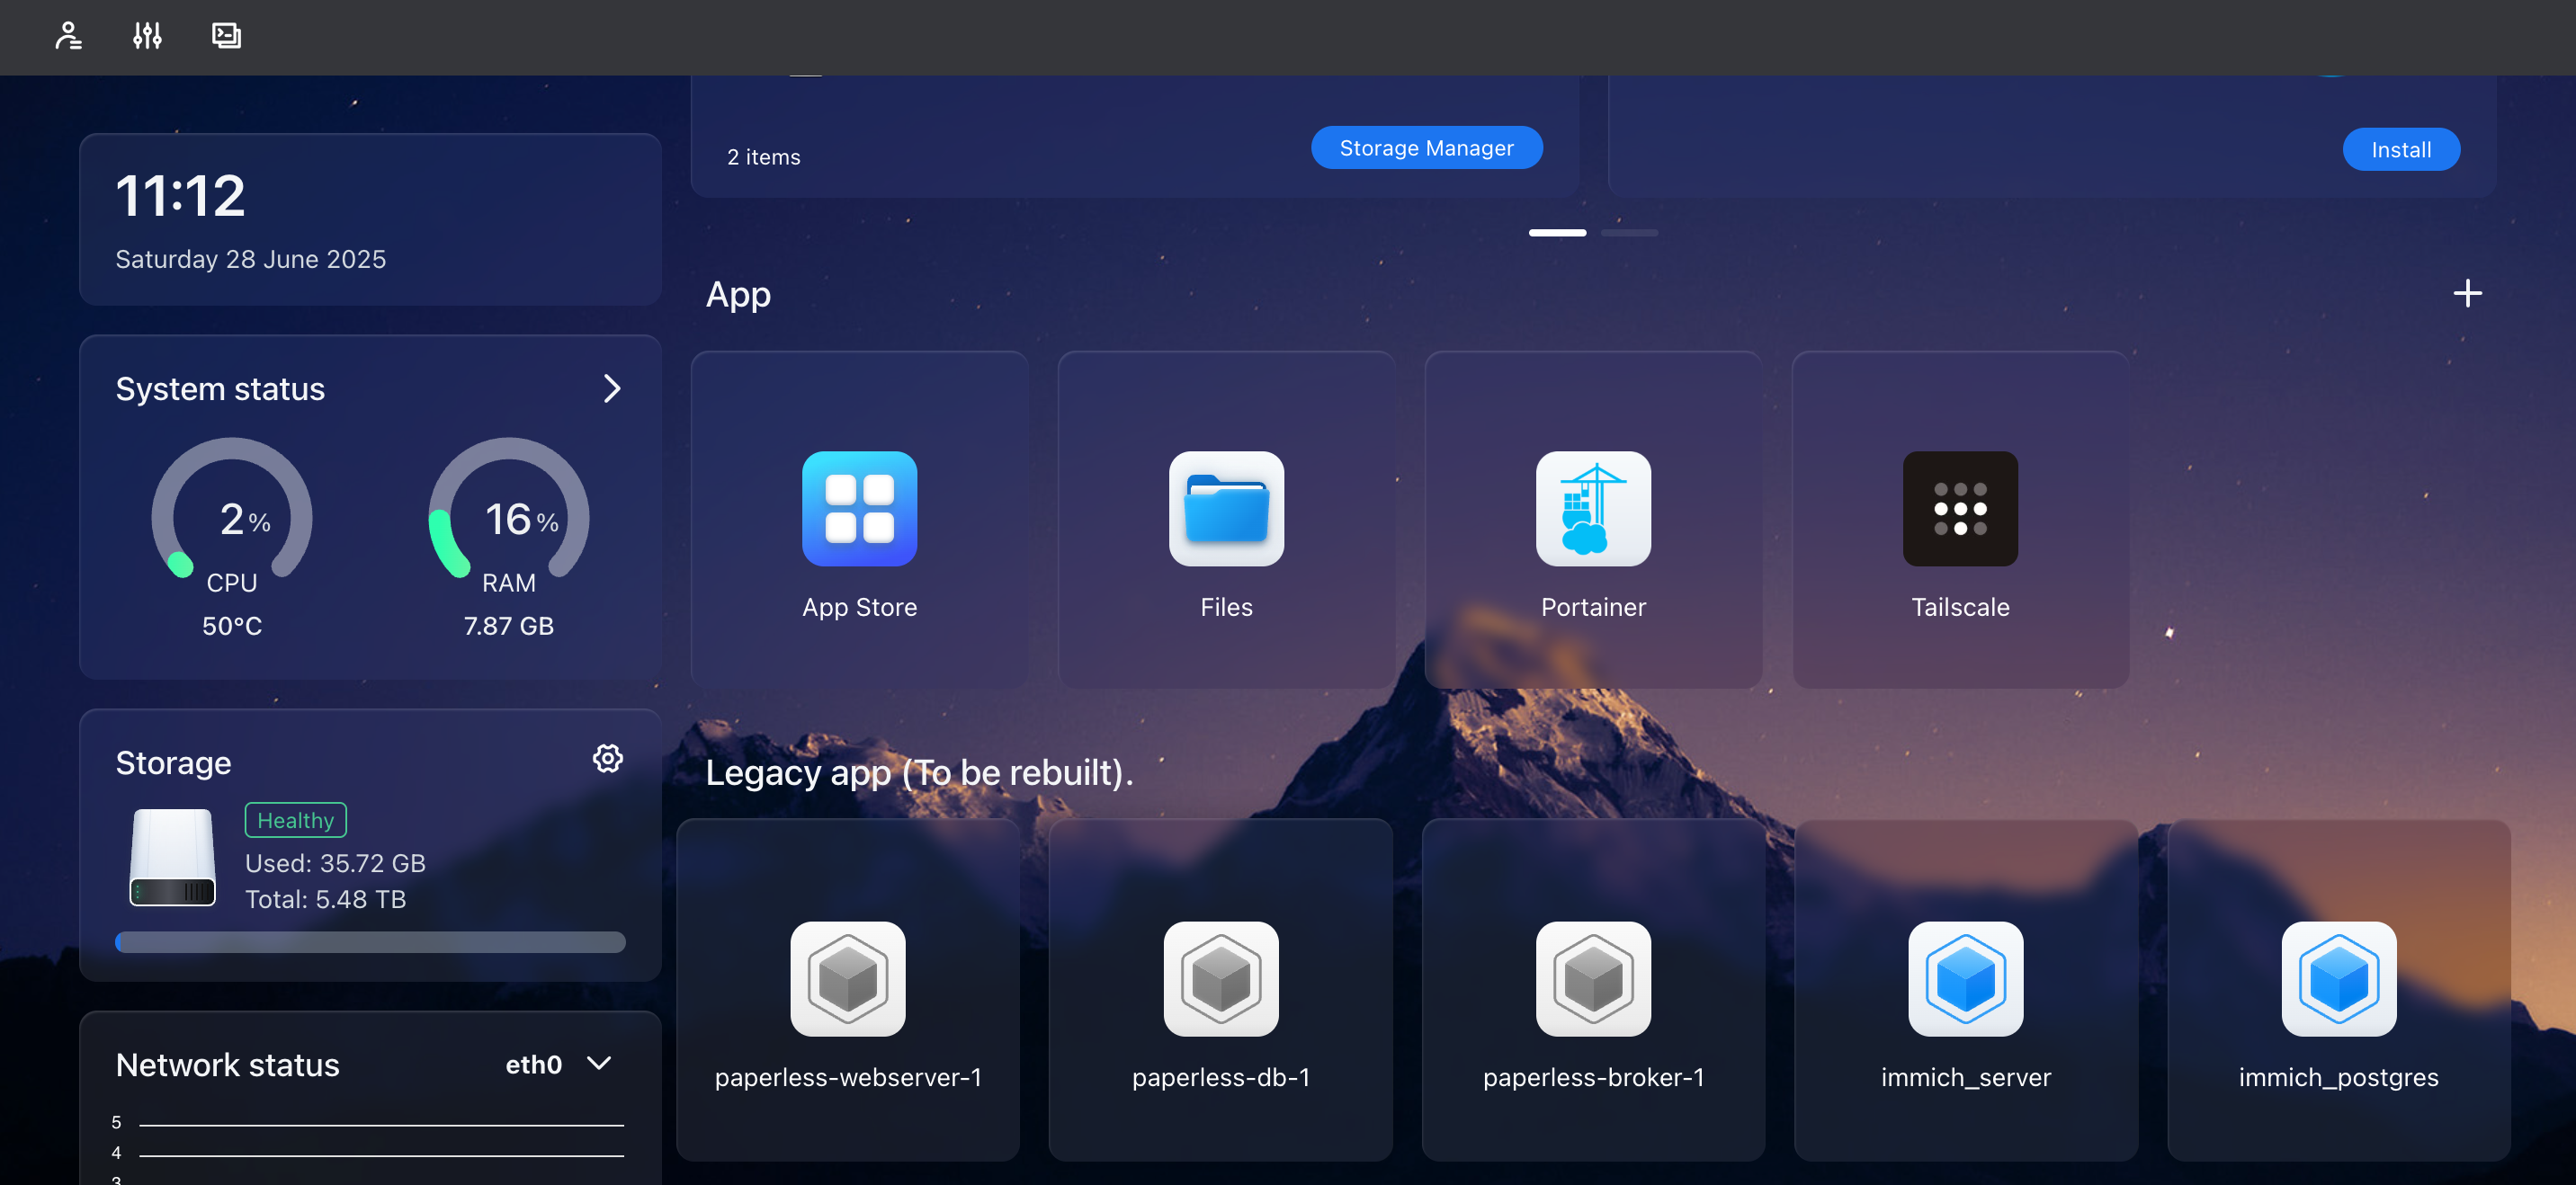
Setting up CasaOS
CasaOS is a user-friendly home server operating system that allows you to manage your files, applications, and services easily. It provides a web interface to manage your NAS and other services.
- Open a terminal on your Raspberry Pi or connect to it via SSH.
- Install Docker if it is not already installed:
sudo apt install docker.io - Start the Docker service:
sudo systemctl start docker - Enable Docker to start on boot:
sudo systemctl enable docker - Install CasaOS using the following command:
curl -fsSL https://get.casaos.io | sudo bash - After the installation is complete, you can access the CasaOS web interface by navigating to
http://<your-raspberry-pi-ip-address>:portin your web browser. Replaceportwith the port number you specified during the installation (default is 80). - Log in with the default credentials:
- Username:
admin - Password:
casaos
- Username:
- Change the default password after logging in for the first time.
Setting up Raid 5
To set up a RAID 5 array with the 3 SATA SSDs connected to the Radxa SATA HAT, you can use OpenMediaVault's web interface. RAID 5 provides a good balance of performance and redundancy, allowing you to lose one drive without losing data.
- Open the OpenMediaVault web interface.
- Go to
Storage>Disks. - You should see the 3 SATA SSDs listed there. If they are not listed, you may need to format them first. Also check if you have followed the instructions to connect the Radxa SATA HAT and the SSDs properly.
- To format a disk, select it and click on
Wipe. - Choose
QuickorSecurewipe as per your preference. - Click on
Yesto confirm. - Repeat this for all 3 SSDs.
- To format a disk, select it and click on
- Go to
Storage>RAID Management. - Click on
Createto create a new RAID array. - Select
RAID 5as the RAID level. - Select the 3 SSDs you want to include in the RAID array.
- Click on
Createto create the RAID array. - Wait for the RAID array to be created. This may take some time depending on the size of the SSDs.
- Once the RAID array is created, you can see it listed under
Storage>RAID Management. - Go to
Storage>File Systems. - Click on
Createto create a new file system. - Select the RAID array you just created.
- Choose the file system type (e.g.,
ext4) and give it a name. - Click on
Createto create the file system. - Once the file system is created, you can see it listed under
Storage>File Systems. - Click on the file system and then click on
Mountto mount it. - Go to
Storage>Shared Folders. - Click on
Addto create a new shared folder. - Select the file system you just created and give the shared folder a name.
- Click on
Saveto create the shared folder. - Go to
Access Rights Management>User. - Click on
Addto create a new user. - Give the user a name and password.
- Assign the user to the shared folder you created earlier.
- Click on
Saveto create the user. - Go to
Services>SMB/CIFS. - Enable the SMB/CIFS service.
- Go to
Sharesand click onAdd. - Select the shared folder you created earlier and give it a name.
- Click on
Saveto create the share. - You can now access the shared folder from your local network using the SMB/CIFS protocol.
Setting up Tailscale
Tailscale is a secure VPN service that allows you to access your devices from anywhere. It creates a secure connection between your devices, allowing you to access your NAS from anywhere in the world.
- Open a terminal on your Raspberry Pi or connect to it via SSH.
- Install Tailscale using the casaos app store or by following the instructions by BigBearTechWorld on YouTube.
- After the installation is complete, you can access the Tailscale web interface by navigating to
http://<your-raspberry-pi-ip-address>:portin your web browser. Replaceportwith the port number you specified during the installation (default is 80). - Log in with your Tailscale account credentials.
- Follow the instructions to connect your Raspberry Pi to Tailscale.
- Once connected, you can access your Raspberry Pi from anywhere using the Tailscale IP address.
Setting up Immich
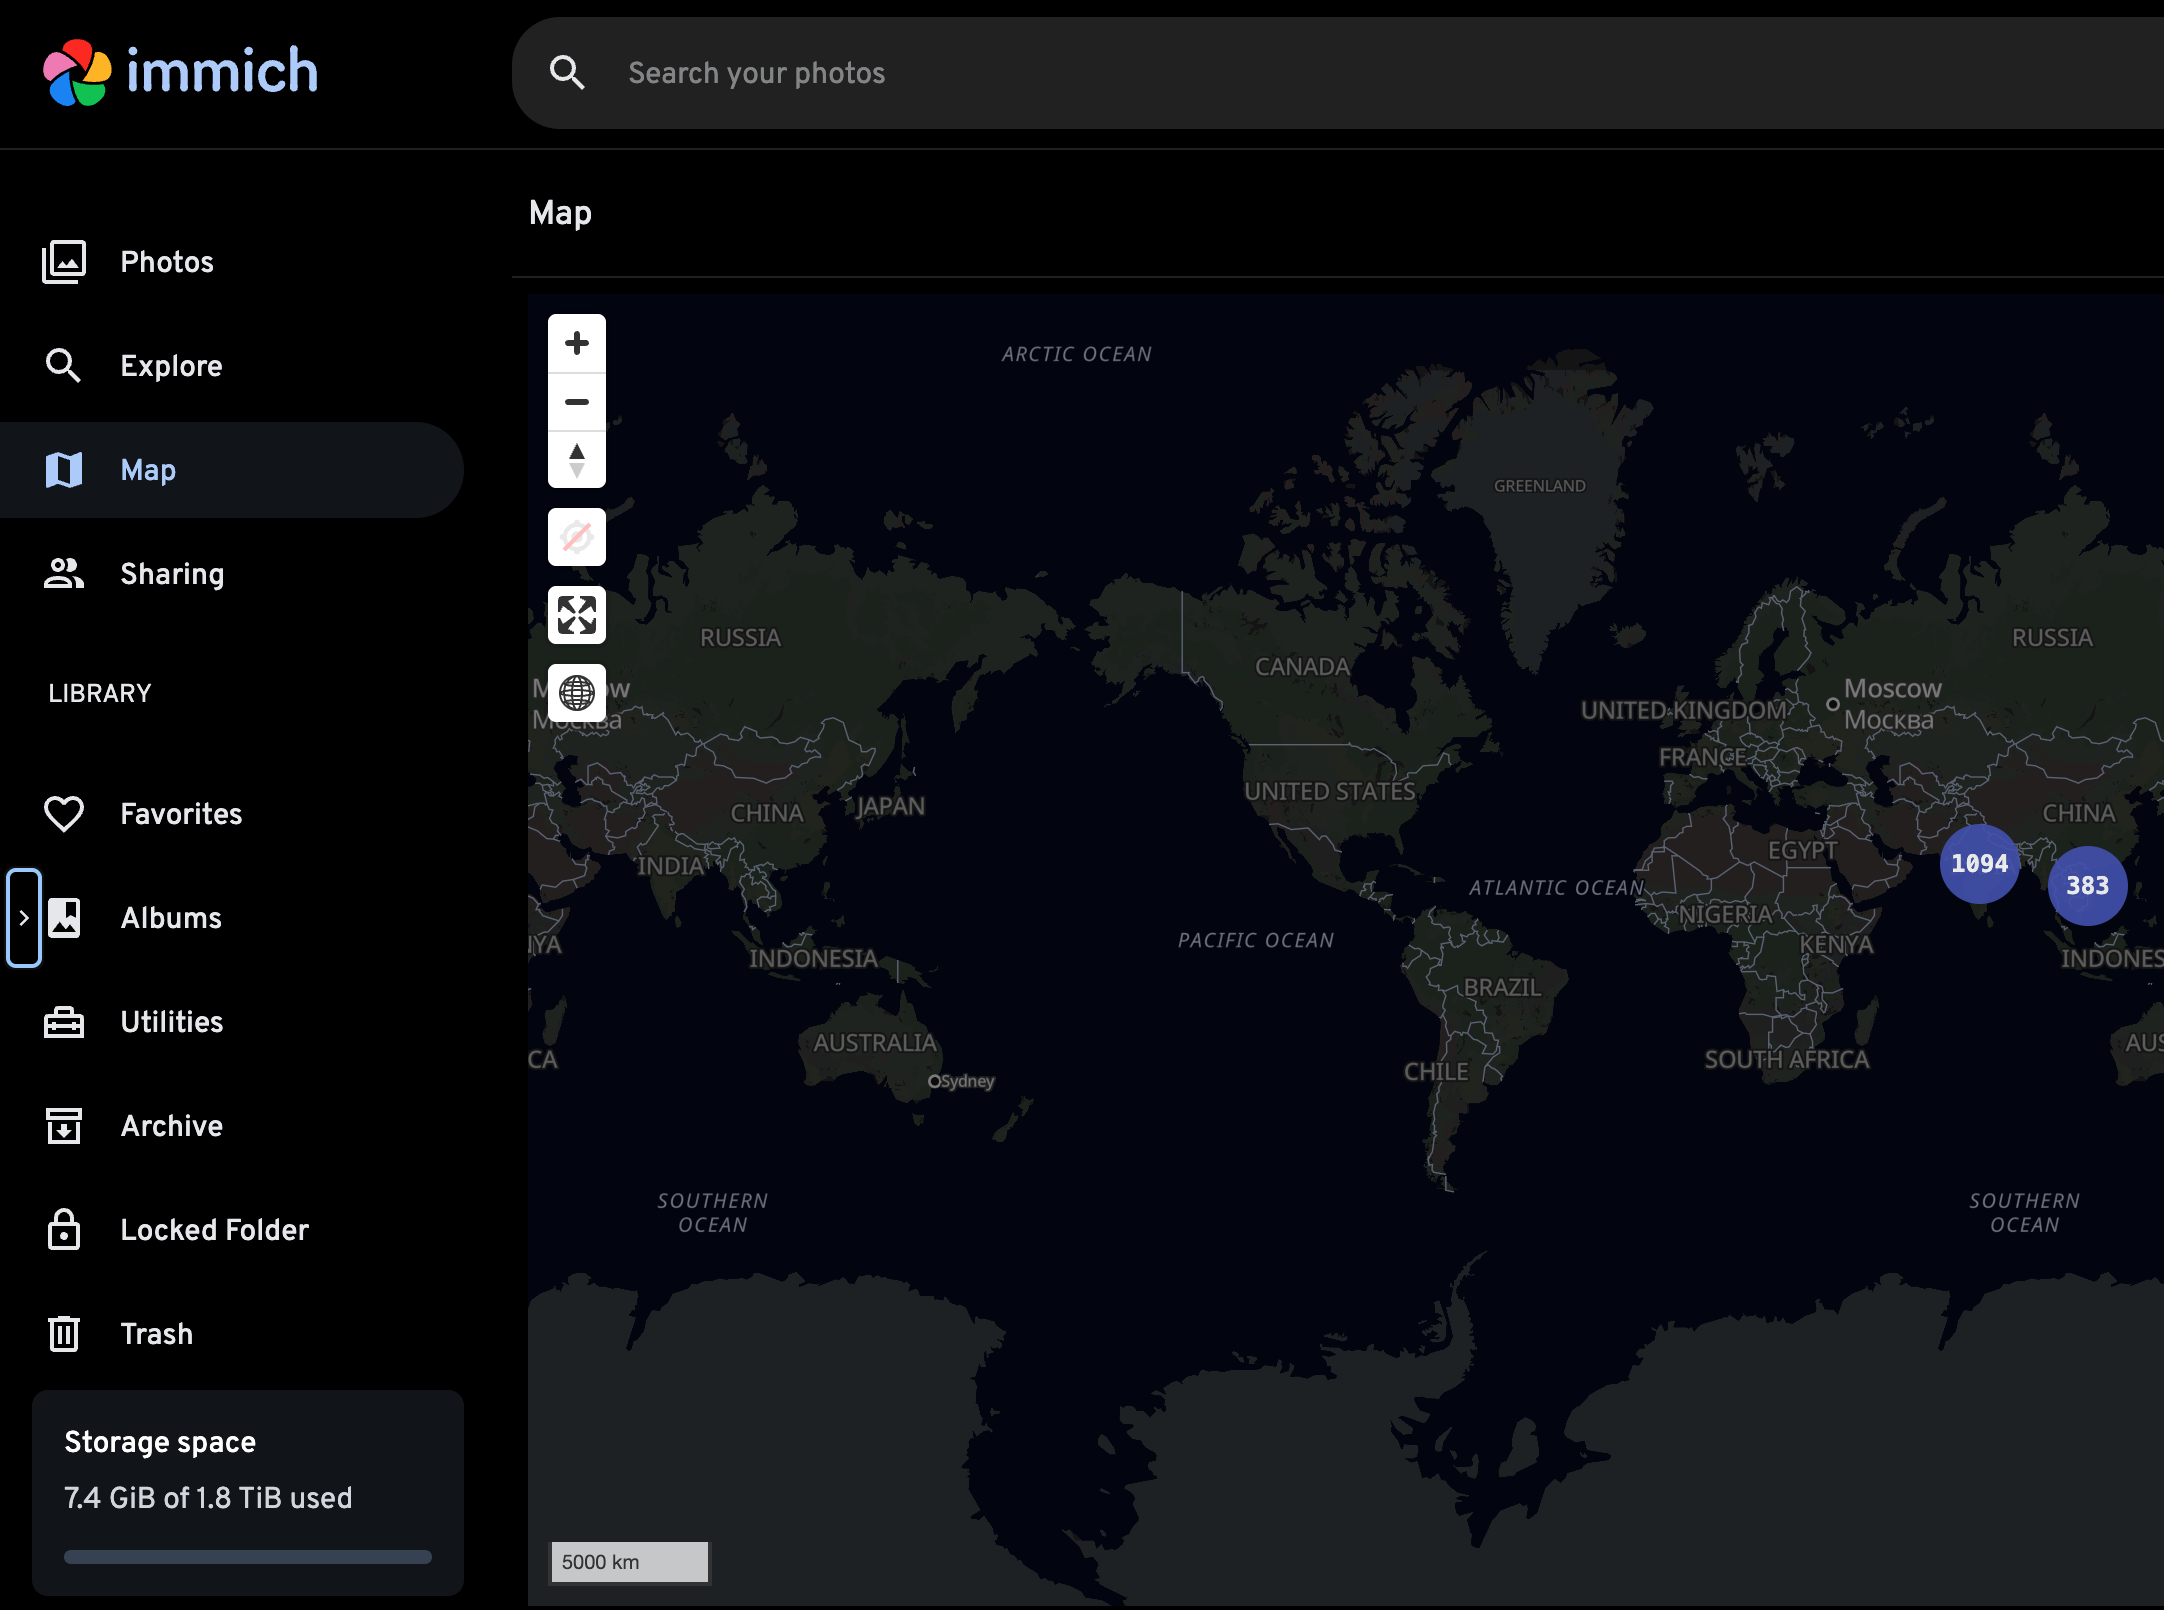
Immich is a self-hosted photo and video backup solution that allows you to upload your photos and videos to your NAS and access them from anywhere. It provides a web interface to manage your photos and videos, and it also has mobile apps for iOS and Android.
- Open a terminal on your Raspberry Pi or connect to it via SSH.
- Install Immich using the casaos app store or by following the instructions on the Immich GitHub repository.
- After the installation is complete, you can access the Immich web interface by navigating to
http://<your-raspberry-pi-ip-address>:portin your web browser. Replaceportwith the port number you specified during the installation (default is 80). - Log in with your Immich account credentials.
- Follow the instructions to connect your Raspberry Pi to Immich.
- Once connected, you can upload your photos and videos to Immich and access them from anywhere using the Immich web interface or mobile apps.
Setting up Immich mobile app
To access your photos and videos on the go, you can install the Immich mobile app on your iOS or Android device.
- Download the Immich app from the App Store or Google Play Store.
- Open the app and log in with your Immich account credentials (make sure you are on your local network or connected via Tailscale to access your raspberry pi).
- Once logged in, you can access your photos and videos from your NAS and upload new photos and videos directly from your mobile device.
- You can also enable automatic backup of your photos and videos to Immich by going to the app settings and enabling the "Automatic Backup" option.
Setting up Portainer on CasaOS
Portainer is a lightweight management UI that allows you to easily manage your Docker containers, images, networks, and volumes. It provides a web interface to manage your Docker environment.
- Open the CasaOS web interface.
- Go to the App Store and search for "Portainer".
- Click on the Portainer app and then click on "Install".
- Follow the instructions to install Portainer.
- After the installation is complete, you can access the Portainer web interface by navigating to
http://<your-raspberry-pi-ip-address>:9000in your web browser. - Log in with the default credentials:
- Username:
admin - Password:
portainer
- Username:
- Change the default password after logging in for the first time.
Conclusion
This guide has walked you through the process of setting up a NAS using a Raspberry Pi, OpenMediaVault, CasaOS, Immich, and Tailscale. You now have a fully functional NAS that allows you to store, manage, and access your photos and videos from anywhere.
You can also use Portainer to manage your Docker containers and applications on your Raspberry Pi. Feel free to explore other applications available in the CasaOS app store to enhance your NAS experience. If you have any questions or suggestions, feel free to reach out to me on Twitter or GitHub.